AI Image Generator Anime: Styles, Prompts and Refinement
November 15, 2026 · 15 min read
You've written a prompt that reads like a short story. The first image is gorgeous, so you save it. The second has a different face, a different jacket, and one extra finger. An hour later you're eleven versions deep and further from the character you had in mind.
That gap between one lucky image and a repeatable result is where most anime prompting goes wrong, and it usually isn't the model's fault. A style word overrode everything else. A count tag was missing. An action was described in a full sentence instead of a tag.
This guide treats each anime look as a set of words you can copy and test, and treats consistency as something you measure across ten images rather than judge from one. You'll get the style keywords, a prompt recipe, a fix table for the usual breakages, and a scoring sheet for choosing a model against your own brief.
Table of Contents
- Anime Styles and the Prompt Words That Trigger Them
- Style Tags Outweigh Almost Everything Else
- Test Each Style On Its Own
- How Anime Models Read Your Prompt
- Two Scores That Measure Different Things
- A Prompt Recipe for Consistent Anime Characters
- Fixing Hands, Poses and Character Drift
- Run Ten, Not One
- Refining Results With Line Art and Image References
- The Loop in Five Steps
- The Slip That Ruins the Comparison
- Using AI Anime Images Safely in Commercial Work
- Build an Evidence File per Image
- Separate Three Questions
- Pick a Model and Test It on Your Own Brief
Anime Styles and the Prompt Words That Trigger Them
The look comes first. A cel-shaded poster and a watercolor story cover are built from different words, and switching styles halfway through a project is what makes a set of images feel assembled by six different artists. Pick the look, then build everything else around it.
| Style | Visual traits | Best use | Prompt keywords to try |
|---|---|---|---|
| Classic cel anime | Flat color, sharp lineart, limited shading | Retro looks and series posters | cel shading, flat colors, sharp lineart |
| Modern digital anime | Clean lines, soft gradients, glossy highlights | Character art and game portraits | clean lineart, soft shading, anime key visual |
| Manga black and white | Ink lines, screentone, no color | Comics and storyboards | monochrome, screentone, manga panel |
| Chibi | Big head, small body, simple shapes | Stickers, icons and merch | chibi, super deformed, simple background |
| Painterly anime background | Soft brush textures, detailed scenery | Story covers and worlds | painterly background, soft lighting, watercolor |
| Semi-realistic anime | Realistic proportions, anime eyes | Fan art and portrait sets | semi-realistic, detailed face, soft rim light |
Style Tags Outweigh Almost Everything Else
A term like screentone doesn't nudge the ink, it rewrites how every surface in the frame is shaded. Cel shading flattens each surface into two or three tones. Chibi changes the proportions of the body, not just the mood.
That weight is exactly why a strong style tag can swallow the subject. Ask for cel shading plus a highly detailed realistic face, and the flat color usually wins while the face loses the modeling you wanted. Check the first four results before you add any subject detail.
Practical rule: one primary style tag, no more than two supporting tags, and no new detail words until the style itself reads correctly.
Test Each Style On Its Own
A model that handles modern digital anime well may still fail at manga screentone. The OneIG-Bench evaluation of anime and stylization prompts tested generators across 245 anime and stylization prompts and found that some models perform well across many styles but still struggle with particular anime looks. A strong general model isn't automatically strong for your look.
So write the style first, generate four images, and keep the look that matches your intended use. If you want a visual anchor for each treatment before you generate, the anime and manga style techniques reference gathers them in one place.
How Anime Models Read Your Prompt
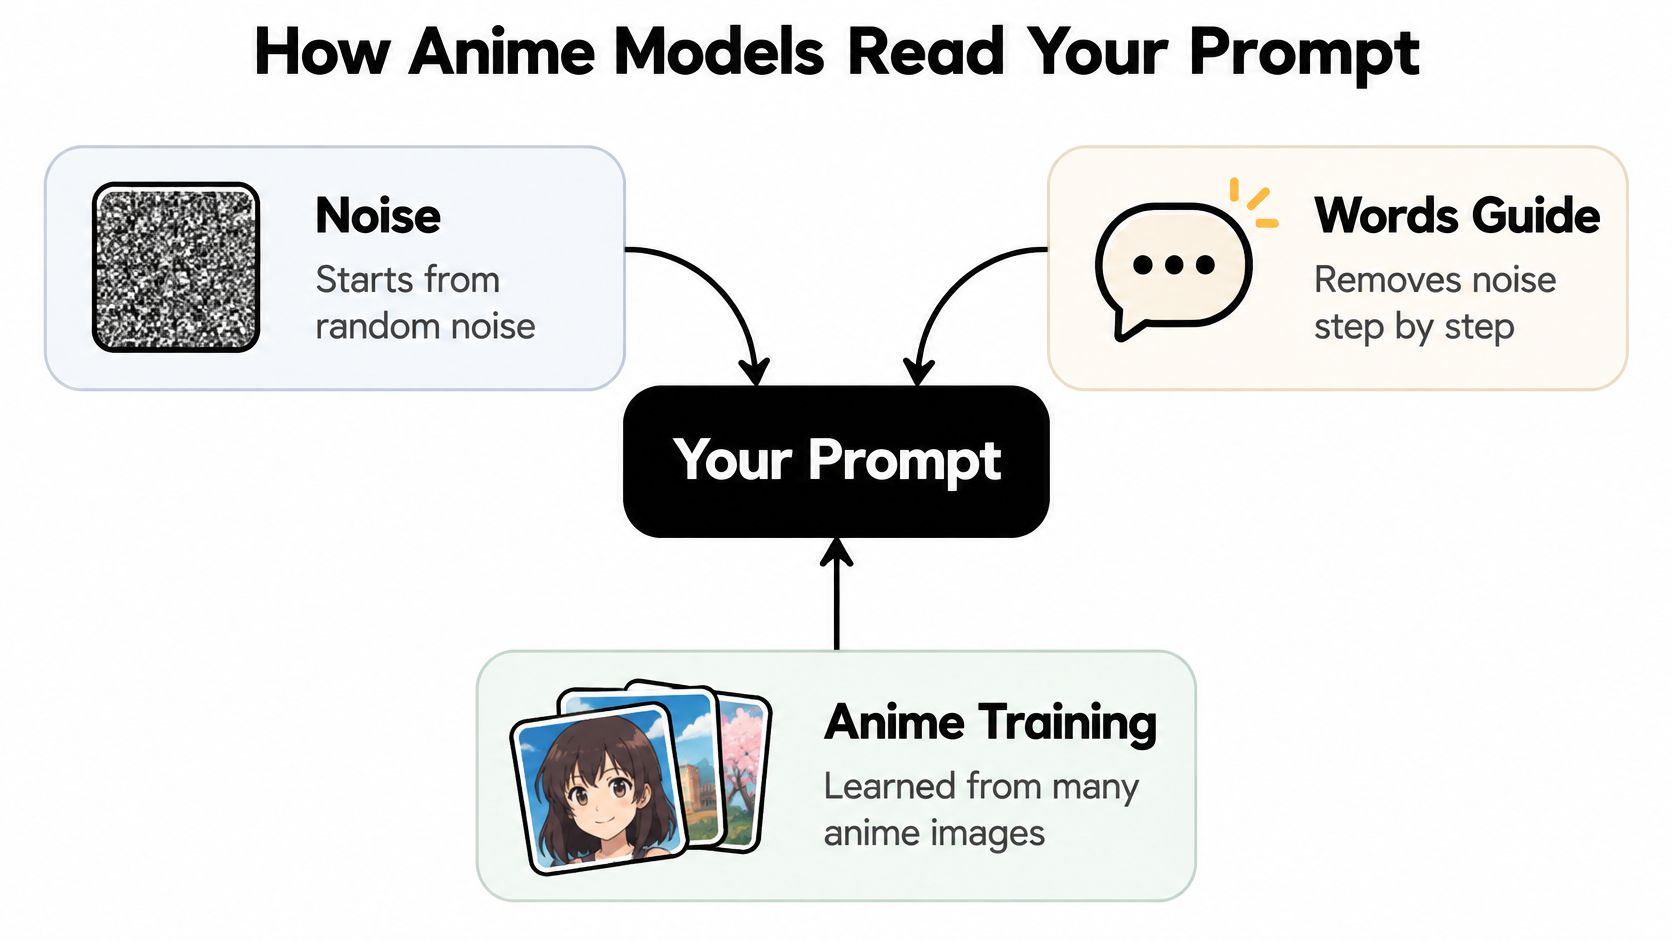
An image model starts with a field of random noise. It removes that noise in steps, and each step pushes the result closer to shapes and colors that match your words. The prompt isn't a description of a finished picture. It's a set of nudges applied dozens of times.
Most anime models learned from images labeled with short tags, the way a fan archive labels its uploads: 1girl, blue hair, looking at viewer, school uniform. Writing in that tag style speaks the language the training data used. Writing a three-sentence paragraph makes the model guess which of your details matter most.
Think about commissioning an illustrator. A checklist gets you a closer result than a story does. "One girl, silver hair, red eyes, black coat, standing" is a brief. "She carries herself with quiet confidence" is a mood every artist interprets differently.
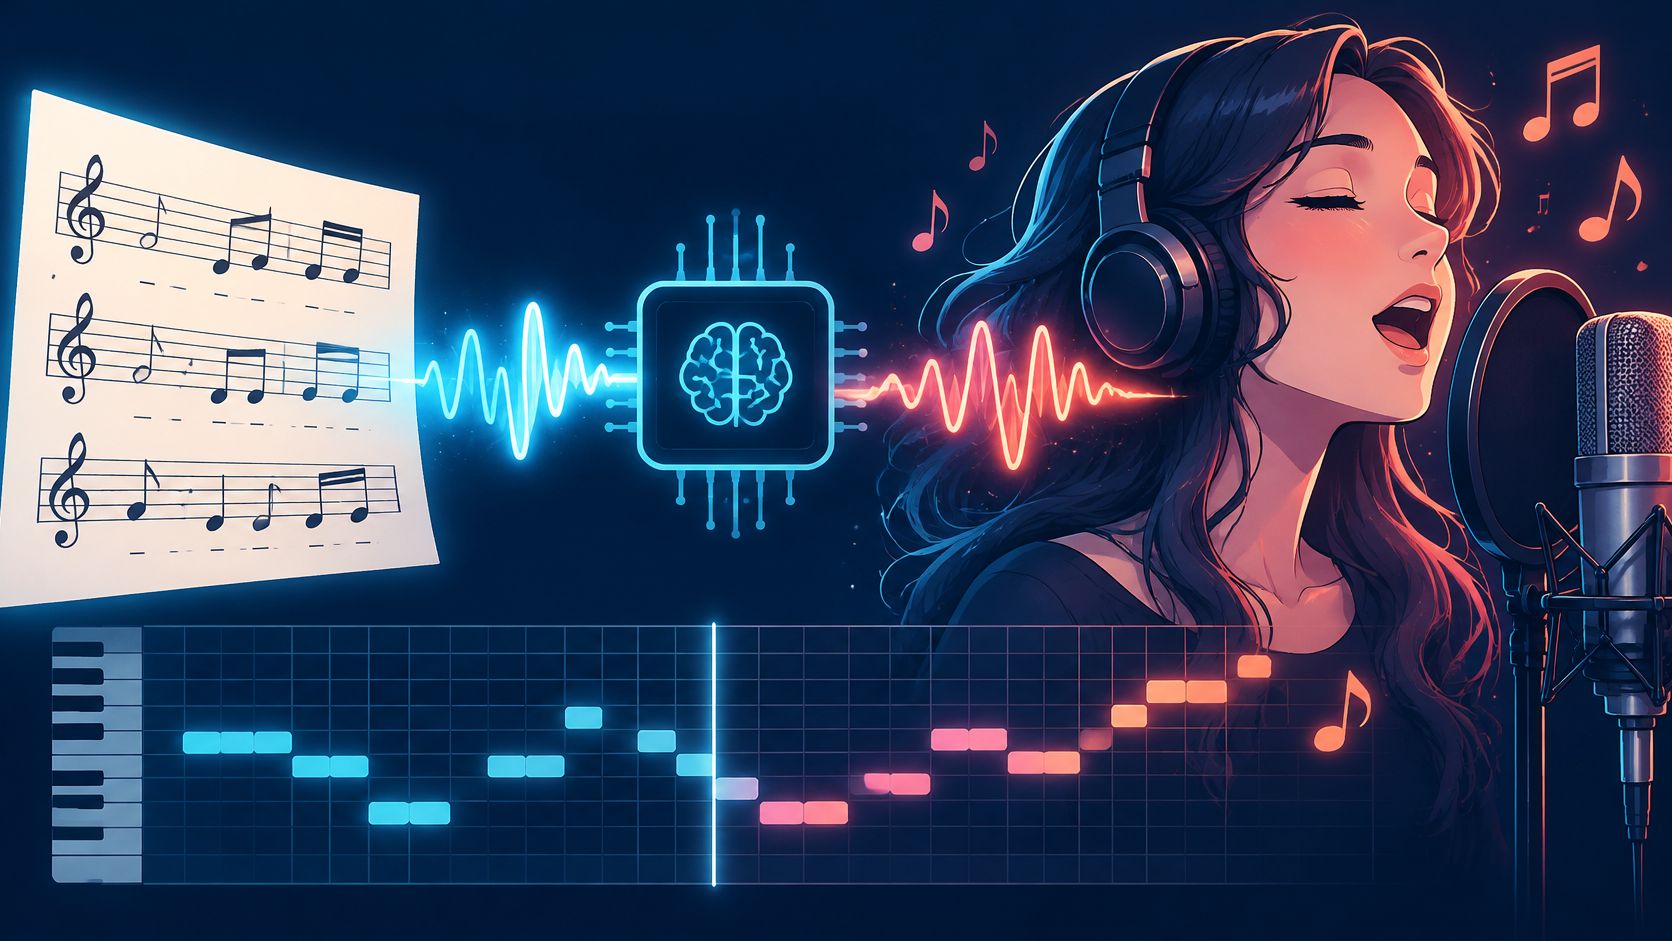
Three ingredients meet in that process, and the diagram below lays them out.
Two Scores That Measure Different Things
Anime-2026, a benchmark built from 1.5 million anime-character images and 14,000 characters, tested five diffusion or multimodal systems on anime-character generation, as reported in the ACM paper on the Anime-2026 benchmark. Tag accuracy, which measures whether requested attributes appear, ranged from 27.93% for Stable Diffusion V2 to 60.50% for GPT-Image-1. Human-vote scores ranged from 3.85% to 60.09% across the same models.
Those numbers answer different questions. An image can be the prettiest result in the batch and still be missing the sword you asked for. The spread also tells you something practical: model choice changes how well your words land, so a model that ignores "blue hair" most of the time won't be rescued by better punctuation.
Text isn't the only input a model accepts. Some projects start from an existing photograph and push it toward an anime treatment, and turning photos into AI visuals covers that route when you need a stylized version of a real shot rather than a character built from words.
Working rule: subject first, then the traits that must match, then the style. After each run, tick off every requested item before you change anything.
A Prompt Recipe for Consistent Anime Characters
Seven lines, in this order. It takes about a minute once you've run it twice, and it removes most of the random variation between images.
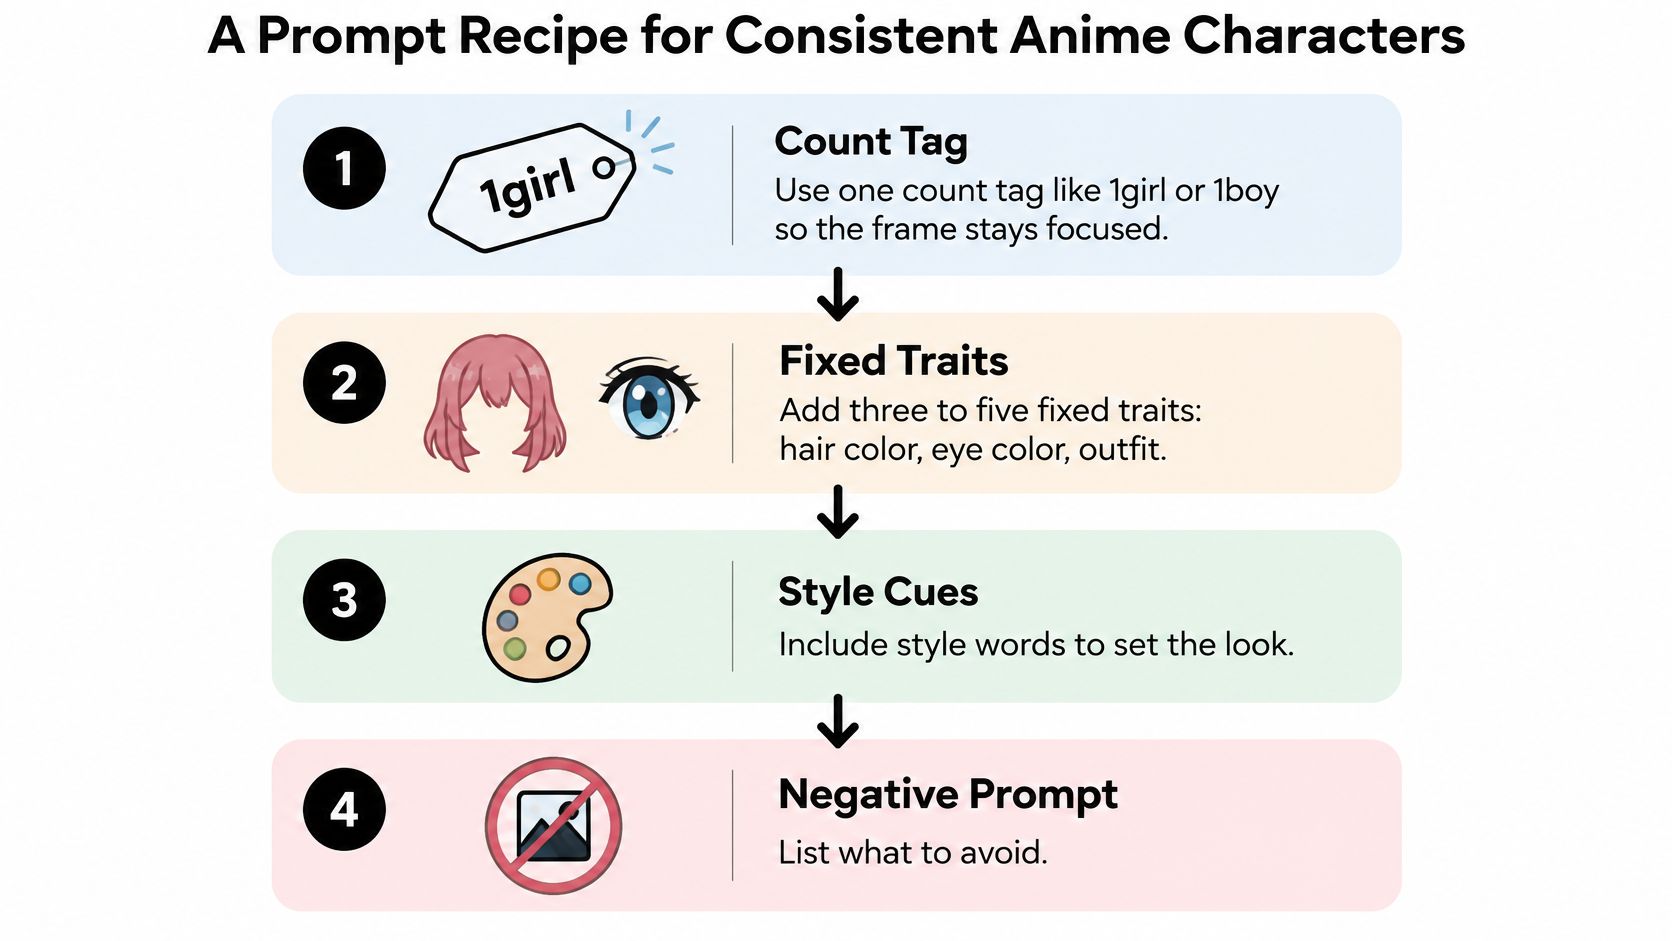
- Name the subject with one count tag. Start with 1girl or 1boy, and add a second count tag only when you want two people. The count tag tells the model how many bodies to plan for. Leave it out and you'll sometimes get a crowd.
- Add three to five fixed traits. Hair color, eye color, outfit, one accessory. Keep the wording identical across every image in the set. The usual slip is rewording "silver hair" as "pale gray hair" three images in, then wondering why the character changed.
- Place the character with a position word. on the left, in the foreground, centered. Tag-trained models are weak at composition, so treat placement as a nudge rather than a guarantee. Burying it inside a long sentence is the slip, because it gets averaged away.
- Add one action per character, as a short tag. holding sword, sitting, looking back. Research on the Illustrious illustration model found its Danbooru tag vocabulary handled concrete objects such as a stained-glass window or a sword more reliably than an action like covering a wound with the left hand, and that longer natural-language prompts were harder to follow. Simple, taggable actions land. Hands interacting with objects often don't.
- Add style words from the table, two at most. Beyond that, the style tags start competing with each other.
- Add the setting in one short phrase. night city street, classroom, forest clearing. A phrase, not a paragraph.
- Write a negative prompt. extra fingers, extra limbs, blurry lines, bad hands, watermark. List what to avoid here so the positive prompt stays focused on what you want.
Before you retype anything: check pose, hands, and character count in the image you just got. Changing the prompt before reading the result is how one small problem becomes five.
Two-character scenes need their own handling, because the tags for both people can blend. The anime couple picture guide walks through that case with paired examples.
Save the finished recipe as a reusable block. Once the trait list and style lines are fixed, each new image in a set only needs a new action and setting, which is what keeps a twenty-image project looking like one project.
If you're building these prompts into an app instead of typing them, prompting advice for API-built image apps covers how the same structure holds when a script writes the prompt rather than a person.
Fixing Hands, Poses and Character Drift
Hands break first. They're small in the frame, they vary endlessly across training images, and a hand gripping an object is a specific, rare configuration. Extra fingers, fused fingers, and a thumb on the wrong side are the most common failure in anime output, and a survey of anime generation methods lists anatomy alongside perspective, line-art sharpness, flat shading, and preserved stylized proportions as recurring trouble spots.
The second common mistake is judging a model on one image. A polished portrait tells you almost nothing about production use, because the real requirement is that the same character keeps face shape, costume, age, body proportions, and palette across twenty images.
Run Ten, Not One
Take one character, one trait list, ten different prompts. Count how many keep the same face and outfit. That count, not the best-looking file in the batch, is your consistency score, and it's the number to compare when you switch models.
| Symptom | Likely cause | Fix |
|---|---|---|
| Extra or fused fingers | Hands are small and varied in training images | Crop to the face or add a pose reference with hands in view |
| Character changes between images | No fixed reference or vague traits | Keep a fixed trait list and reuse one reference image |
| Two characters merge | Tags for both characters blend together | Separate them with position words such as left and right |
| Costume or hair color drifts | Color words are loose | Name exact colors and repeat them in every prompt |
| Pose ignores the request | Actions are described in long sentences | Use a short action tag and a line art reference |
| Face proportions warp | A strong style tag overrides anatomy | Lower the style weight and add a clean anatomy tag |
Some fixes land on the very next generation. Naming exact colors instead of loose ones, splitting two characters with left and right, and lowering a style weight that's overriding the face all work immediately.
Others can't be fixed with words at all. Pose consistency across scenes and a specific hand position both need a reference image, because anime models work from visual statistics that differ from photographic ones: line art, flat color regions, and facial structure each need specialized conditioning. The scale of that specialization shows in the numbers. AnimeDiffusion, a face line-art colorization model, was trained on 31,696 examples and tested on 579, drawn from the Danbooru2020 database of more than 4.2 million images (AnimeDiffusion paper).
Multi-character scenes fail differently. Two people blend into one because their tags merge inside the model, so position tags and separate generations are the practical answer. If the scene matters, generate each character alone and composite.
If you're building a multi-shot set, keeping an AI character consistent across a shoot covers the reference and trait-list side in more depth.
Run the anatomy check on every batch, not just the file you picked. A broken hand you didn't notice ships in three other images.
Refining Results With Line Art and Image References
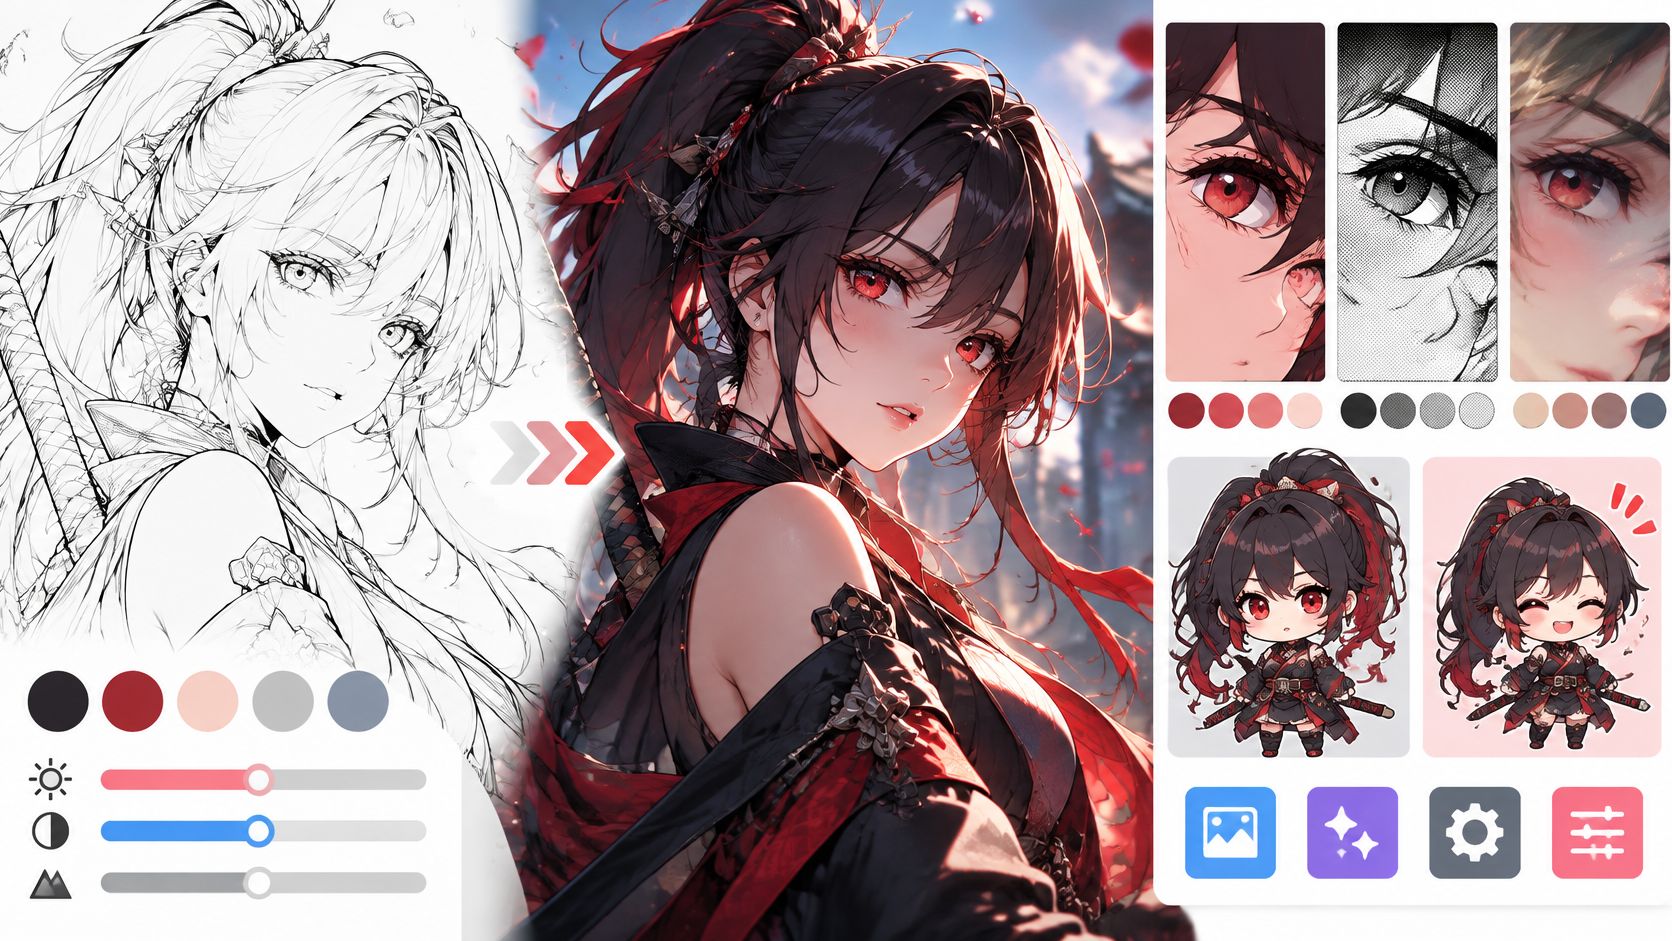
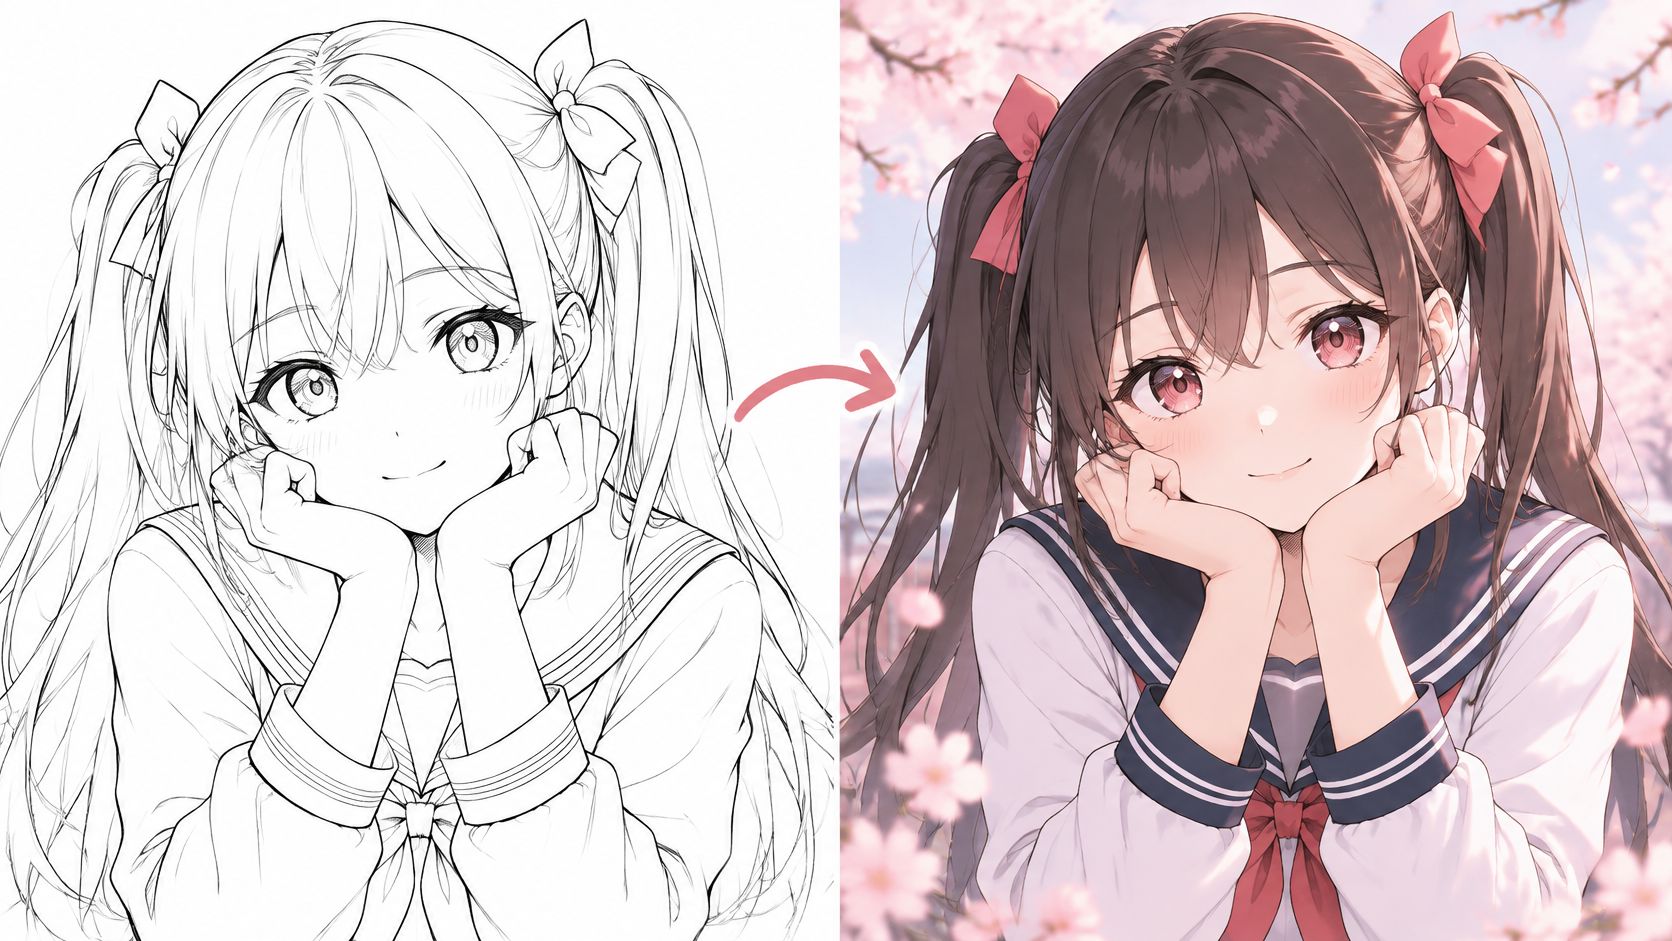
Prompt words change everything at once. A reference image doesn't. Supply a sketch or a line drawing and the model treats those lines as structure, then fills in color, shading, and texture around them. Pose and proportions survive because they were never left to text.
Here's the difference on a single character. The sketch holds the pose, and the model supplies the color.
The Loop in Five Steps
- Start from clean line art or a pose reference. Clean means no shading, no construction lines, and hands drawn where you want them. A single confident outline gives the model something to trace.
- Raise reference influence until the pose holds. Run one test image at a moderate setting. If the pose drifted, push influence up. If the color looks pasted on and flat, pull it back slightly.
- Change palette, lighting, or costume in the prompt. Appearance is a text variable here, structure isn't. That split is the whole advantage of working this way.
- Generate four variants and compare each one to the sketch. Check face proportions and hand placement against the original. The AnimeAdapter editing benchmark covers pose, expression, scene, and local-motion editing, and it also names gaps in preserving fine-grained localized appearance and in controlling selected regions. Small manual fixes are normal, not a sign you prompted badly.
- Fix small areas in an image editor. Eyes, buttons, one strand of hair. Two minutes of retouching beats twenty more generations.
The Slip That Ruins the Comparison
Changing the reference and the prompt in the same pass. When the face moves, you can't tell which change caused it, so the next run is guesswork again. Change one variable per run and hold the rest fixed.
Keep the original sketch and every prompt alongside the output. The AnimeAdapter authors released permissible metadata and the processing pipeline but did not redistribute restricted copyrighted originals, which is a reminder that licensing travels with technique: a model can support the edit you want while its training materials, reference assets, or redistribution terms impose separate limits.
Using AI Anime Images Safely in Commercial Work
Selling an anime-style image starts with a question most generators don't answer: can you show how it was made? Research on anime provenance treats presenting AI-generated images as hand-drawn work as a specific risk to the anime community and industry, alongside copyright violations and inappropriate content modification, per the AnimeDL-2M benchmark paper. That benchmark covers more than two million images spanning real, partially manipulated, and fully AI-generated samples, with stated uses in copyright protection, content moderation, and intellectual-property enforcement.
Ordinary image detectors often miss anime-specific signals, so detection is weak evidence. A record is strong evidence.
Build an Evidence File per Image
- Prompts: every version, with the date it was run.
- Iterations: the rejected generations, not only the final.
- Source sketches and references: the files you started from.
- Human edits: what you changed and in which tool.
- Final output: the delivered file, kept alongside everything else.
Separate Three Questions
A paid plan answers one of them. Commercial permission lets you use an output. Copyright is a separate matter: as a 2025 review of AI anime ownership questions notes, the U.S. Copyright Office has stated that purely AI-generated material isn't protected, while human selection, arrangement, modification, or compositing may be. Third-party risk is the third: permission doesn't clear a character, a trademark, or a training-data claim, and an output that resembles a named franchise or a living artist needs its own check.
Is the character original? Can you show your own edits? Does the design avoid copying a named studio's look? A no to any of the three means rebuild it, not rename it.
One rule stays absolute in our workspace. When the AI character setting is turned on, you confirm that every person in your images is an AI-made character, and that setting is never used with a photo of a real person.
For merch runs, game characters, or anything carrying real revenue, have a lawyer read the evidence file before you print.
Pick a Model and Test It on Your Own Brief
Benchmarks rank models on prompts that aren't yours. The only ranking that matters is the one you run. Take your hardest brief, the character with the specific outfit and the pose that keeps failing, and build it in three different models using an identical prompt and trait list.
Score each one across ten images.
| Criterion | Model 1 | Model 2 | Model 3 |
|---|---|---|---|
| Tag accuracy | 0 to 10 | 0 to 10 | 0 to 10 |
| Character consistency across ten images | 0 to 10 | 0 to 10 | 0 to 10 |
| Hand accuracy | 0 to 10 | 0 to 10 | 0 to 10 |
| Usable share without editing | 0 to 10 | 0 to 10 | 0 to 10 |
| Cost per usable image | Total spend divided by usable images | Total spend divided by usable images | Total spend divided by usable images |
Tag accuracy is the share of requested tags that appear. Hand accuracy is the share of images with correct hands. Usable share is the count you'd ship without opening an editor. Those three numbers will disagree, and that's the point.
Then work out cost per usable image, not cost per attempt. A model that needs four retries to produce one clean result costs more than a pricier model that lands on the first run, and the gap widens over a project.
Run the test once for every anime style you plan to ship, since a model that handles one look well can fail another. If you'd rather not hold three separate accounts to compare, Visual Sandbox runs image models including GPT Image 2.5 Flare, Nano Banana Pro, FLUX 3 Image Klein, and Krea 3 from one balance, through a web app, a CLI, an MCP server, and an API, so the same prompt and trait list can be tested side by side. Then keep the winner and start your next project from its numbers.
Visual Sandbox is a pay-per-use workspace where you can run one anime prompt across several image models, compare the results, and move straight into editing, upscaling, or background removal without changing tools. That makes the ten-image test a twenty-minute exercise instead of a subscription decision. Take your hardest character brief to Visual Sandbox and see which model earns its place.